
|
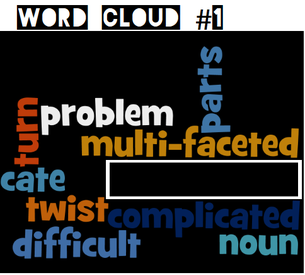
When preparing for a BreakoutEdu with our Read 180 class, I stumbled across teaching vocabulary with word clouds. With a little innovation, we turned the word clouds into more of a puzzle/challenge. What I did was create a word cloud over a specific vocabulary word from the unit. I added the vocabulary word and synonyms for that word to create the word cloud. Then it is time to create the challenge for the students.
You could use this in a station rotation model or gallery walk. Students could create their own clouds, combine with classmates, and then try to solve. The word clouds could also be made with antonyms instead of synonyms. So many possibilities with word clouds that move beyond the boring everyday vocabulary lessons.
0 Comments
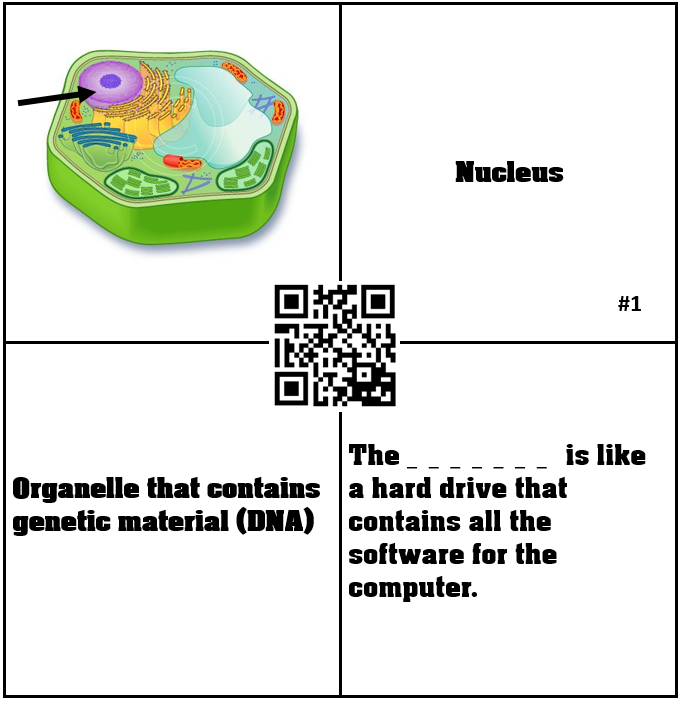
I stumbled across this concept when looking for ways to incorporate vocabulary into our BreakoutEdu games. I saw this on @Melissa_Dux twitter account. She used these to create codes. The QR codes were linked to numbers or letters, which would open up one of the boxes. I revised it to be used in any setting. We are taking the traditional Frayer Model that is used to teach vocabulary and creating a puzzle. Here are the steps.
Let your students become the teacher through use of the collaboration space in OneNote. 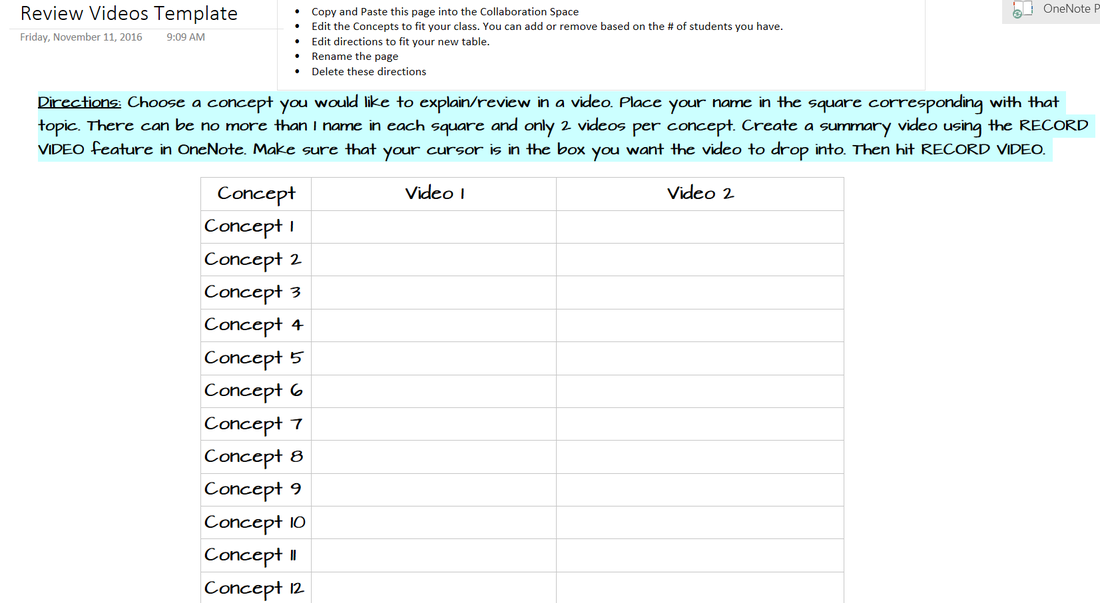 Don't just drone through review of concepts, allow students to lead the way and create a model of collaboration in your classroom.
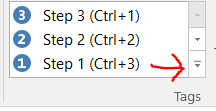
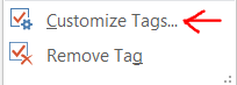
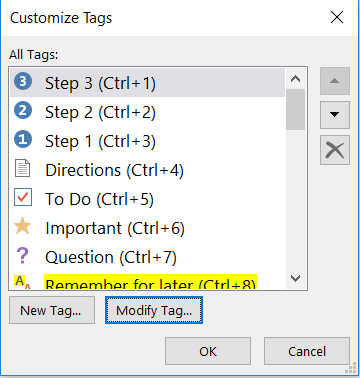
Check out the template here. How to Set It Up 1. Create a table in your collaboration space with 3 columns and enough rows to cover the concepts for your unit. 2. Your first column is for your list of concepts, 2nd column will be for 1st Student Video Post, and 3rd column is for the 2nd Student Video Post. 3. List the concepts you would like to be covered in the rows of Column 1. For example, the topic is Cells. So topics might include: Why are cells the building blocks of life? Differences in plant and animal cells. Explanations of Organelles. Why does size matter in cells? 4. Students will then sign up for a topic, in my example there would be a place for no more than 2 students to sign-up. Students place the name in the box that corresponds with the topic that they have chosen. 5. Students will spend time planning their videos, time is a matter of preference by the teacher. 6. Students insert video into space with their name. Reflection and Evaluation of Videos These can be used as formally or informally as the teacher wants. Rubrics can be made for students making videos, or they can be given larger amounts of freedom. Either way, quality of work will increase if work will be watched by more than just the teacher. Option 1: Students are given a list of questions each video should answer, and they evaluate their peers on how well those questions were answered. They can provide feedback on how videos could be improved or could offer positive reflections. Option 2: Students are required to watch 1 of the 2 video topics and leave a comment. Option 3: Students can choose topics that they need the most help with and watch BOTH videos within that topic. They can describe how those videos were different or similar. Option 4: Students must summarize thoughts of their peers in the video but those summaries are not shared with the class. Option 5: Students are given time in class to watch videos and then a teacher lead discussion occurs to evaluate the content of the videos. I think the possibilities are quite numerous and hopefully the above gives you some ideas to work with. Students who can teach, are going to have an increase in their learning and in turn you are going to create a library of videos to help others in the classroom. What Are Tags?OneNote tags can add some structure to your classroom and keep you and your students organized. Tags are icons that you can add to your OneNote pages and then can be searched later on. How Do I Add Tags?They can be found under the Home Tab. You can customize the look and name of your tag. You can tag images or text, simply click what you want to tag, then add a tag from the drop-down menu. So yes, tags are easy, but how can they be used in the classroom? 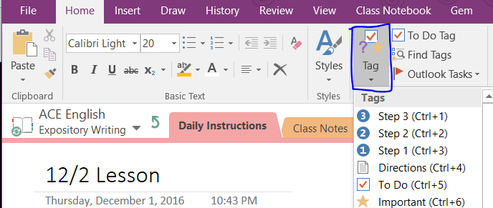 How Do I Customize Tags?Customizing your tags allows you to name and choose symbols form the list to create your own tags. It is simple. Select the drop-down menue and then select customize tag. Then you can create a New Tag or Modify a Tag.
How Do I Search For Tags?Searching for tags is what makes tags so amazing! Select Find Tags from the Home Tab and then you can search by Tag Name, Section, TItle, Date, or Note Text. So organize your tags or find them quickly. See below how this feature can be used in the classroom! 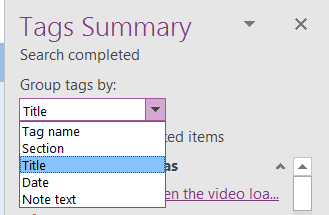 How Can You Use Tags In The Classroom?#1: Use Tags To Save Favorites Mrs. Weir in our English 1 Department uses tags to save her favorite assignments and locate them easily to share and reference later on. As she grades assignments, she places a tag next to the assignments she wants to show-off or save for later. When she is ready to share, she simply goes to Find Tags, searches by the name of her tag and can click through them quickly to show to others without having to search through individuals notebooks. #2: Collect Questions Students can use the question mark tag to select information that they have questions over. As you move through the lessons tell students to tag any information that doesn't make sense or that you need to review again. After the lesson is over, search the Question Tag and see what kids aren't understanding. Then the next day or later, you can select each question tag and go back over the information. #3: Create To-Do Lists or Checklists Adding To-Do list tags allows you or your students to create a list that can be checked off as it is completed. The teacher or student can then do a search for completed tags, giving an idea of who has completed which parts of the list. This can help you and your students stay organized. These lists could consist of: TEKS or content and can be checked off as mastery is shown, order of assignments to be completed, or checkpoints to a project. Countless possibilities! Leave us a comment and tell us how you use tags in your classroom!
Teachers don't have enough time in the day as it is, so how can technology help you work smarter, not harder? Check out my favorite tips below!#1 Start Your Day With a Little Momentum I know the first thing I do everyday when I get to school, is turn on my computer and open up my email, lessons for the day, gradebook, etc. Almost everything I initially do, is through a web browser. The Momentum Chrome Extension, opens a New Tab in your web browser with a calming image, quote for the day, time, a welcome message, to-do list, links, and weather. It is just the right dose to focus me for my day. I type in what I want to focus on, read my quote, and then open up all my links, through that one page. 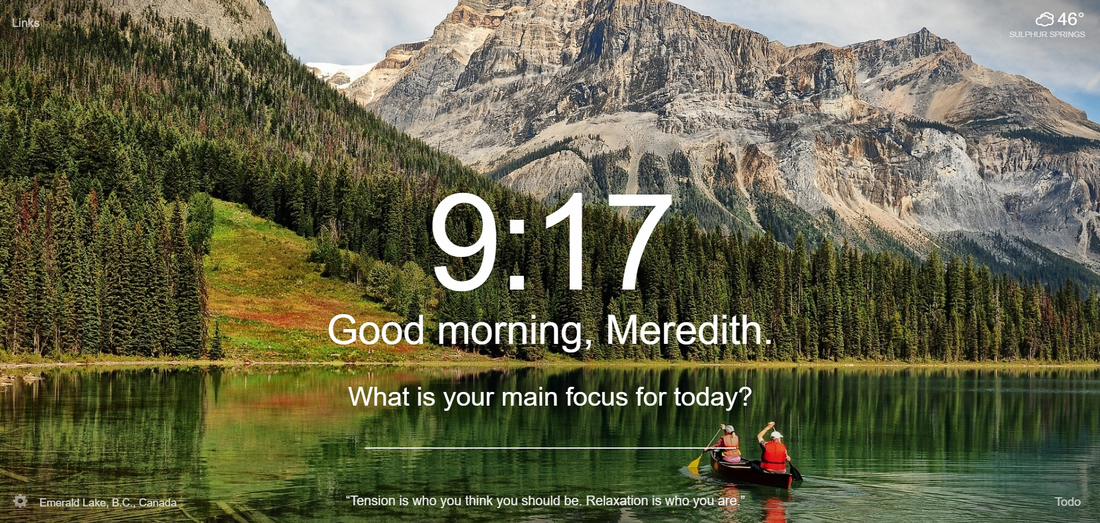 #2 Use Shortcut Keys
CTRL-C and CTRL-V: Never copy and paste any other way again. Select the text and CTRL-C to copy and CTRL-V to paste. TIME SAVER! CTRL-Z: Probably my second most used shortcut, right behind copy and paste, is Undo. Typing, copying and pasting, moving images, formattig.....list can go on with the things I screw up on a daily basis. CTRL-Z undoes any of your screw ups. So don't panic, just undo. CTRL- B, CTRL-I, CTRL-U: Whether I am creating lessons in OneNote, pages for teachers, documents, or blog posts I am always using formatting to change font. These shortcuts will Bold, Italicize, and Underline quickly! #3 Bitly and Google Shortener Chrome Extensions URL shorteners are the best! To make it even easier, use Bitly and Google Shortener chrome extensions to make shortening only 1 click away. Plus save your links to use again! #4 Split Screen to Work Quicker Anytime I working between two or more tabs, I split screen. So if I am grading work in OneNote, then I am split screened with Skyward and putting those grades in. Don't waste time, enter as you grade! If you are having kids researching and writing, have them split screen their work. If they are doing an online lab and filling out a lab report, split screen! Try downloading Tab Resize or Tab Scissors extensions from Google Chrome Store to make resizing a synch. As we reach the end of the semester, everything gets out of control. December might be the busiest time of the year, so work smarter and not harder! Week 4 of Marzano Strategies focuses on Cues, Questions, and Advanced Organizers. The video goes over some ideas of how to integrate technology alongside this instructional strategy. It gives you some examples, websites, and templates that could be used. Here is a link to the OneNote page that is shown in the video. Cues, Questions, and Advanced Organizers (Web view) Check it out to get the links that are discussed in the video. This week we are looking at incorporating tech to help facilitate cooperative learning in the classroom. One of the beauties of technology is the ability for students to work simultaneously on a project through either OneDrive or OneNote. This video shows you examples of how the collaboration space in OneNote can be used to incorporate the Jigsaw Method (breaking up content into smaller pieces for groups to collaborate on) or work on creation tasks (like making a video or PowerPoint presentation). This video also speaks on the use of OneDrive for collaborative writing. As part of the month of October, we are looking at ways to use tech integration when using Marzano's strategies. This week the strategy is Identifying Similarities and Differences. The video walks you through some applications from ReadWriteThink.org, Padlet, and Diffen.com. Check it out! The month of October is focusing on Marzano Strategies. In this week's video, we will be keying in on Summarizing and Note-Taking Strategies using OneNote and other online applications. |


 RSS Feed
